Your Nest Thermostat can better give an accurate reading if it’s calibrated properly. The Thermostat will precisely measure the temperature of your room based on the ambient temperature and provide you with an accurate reading of the room’s temperature.
In short, to calibrate your Nest thermostat,
- Make sure you install a low-voltage HVAC system.
- Go to settings and Choose Reset Settings.
- Tap on restart.
- Do a factory reset when the restart is completed.
In this article, we have provided a step by step guide on how to calibrate your Nest Thermostat and resolve the temperature problems and calibration issues with your Thermostat.
What does it mean by Thermostat Calibration?

Like other thermostats, Nest thermostats do have a temperature sensor that detects the temperature of the inside air and tells the heating or cooling system when to start a cycle.
This sensor will accurately read the temperature of your house if it has been properly calibrated.
The calibration procedure entails changing the Thermostat’s reading per the ambient temperature. You may use a room thermometer to verify the calibration of your Thermostat.
It would be best if you mount or tape it next to the Thermostat’s location and allow it a few minutes to provide you with the temperature and note down the temperature readings by both devices.
If the reading in both devices differentiates by more than one degree, your Nest may not be correctly calibrated.
Also Read – How To Hold Temperature on Nest Thermostat?
Factors That May Cause Difference in Temperatures

Direct Sunlight
You must have noticed that you likely get warmer when you’re walking in the sun compared to someone who isn’t directly in it. You could run into the same issue with your thermostat.
Your Nest thermostat will often register greater interior temperatures when the sun is directly above than if placed in a dimly light region of the house. Sometimes this is unavoidable because of the seasons of the year.
Appliances
If your Thermostat is installed closer to home appliances such as chimneys, ovens and boilers, it would likely not read the actual temperature.
Heat sources like fireplaces, dryers, and ovens all result in incorrect readings from thermostats. They emit heat that raises the temperature over that area of the house. The power or utility bill cost will also rise due to these factors.
Location of the Thermostat
The thermostat’s location is also a factor that determines your thermostat readings. If the sun is shining directly on your Thermostat during the summer (hot weather), the Thermostat will read the higher temperature inside your house may read hotter than it is.
Similarly, if it is mounted on an outer wall in the cold weather, winter conditions may make it impossible for the heater to run for the required time to heat the house, forcing an early heating shutdown.
In these circumstances, it’s essential to keep notice of your Thermostat’s location to keep from re-calibrating your system and spending more energy.
Thermostat is Placed Near a Vent
If your Thermostat is installed too close to your home’s vents, it may display incorrect temperature readings.
If the Thermostat is placed next to one of the vents in your home, the draught from a window, door or air vent may cause an inaccurate temperature reading.
Set your Thermostat as centrally as possible while keeping it as far away from these elements as possible for the exact temperature measurement.
Dust or Dirt
Maintaining a clean, dust-free thermostat is very important. Your Thermostat’s sensors may become clogged with dust and debris, giving false readings.
Dust your Thermostat once a week or once a day to prevent this.
Problem with the Thermostat itself
If your Thermostat is broken or out of commission, the Nest Thermostat cannot be expected to give correct readings. The thermostat may have a fault that an only an HVAC engineer can fix.
If your Thermostat is still under warranty or is still quite new, you may be able to receive a replacement thermostat at no cost in this situation.
How To Calibrate Nest Thermostat?
Check The Thermostat Reading Accuracy
To ensure that your Thermostat is appropriately calibrated, you should observe the temperature readings first. See if it’s reading correctly by using a thermometer and placing it close to your Thermostat with tape. Note the readings of both the Thermostat and thermometer. (1)
Your Thermostat is calibrated correctly if the readings from both devices are the same and the difference is 10F or less.
If the difference is larger than 1 degree, your Thermostat would need to be adjusted. A professional can easily resolve the issue with your Thermostat as advised against self-attempt.
If you have issues with the Thermostat’s precision, you should look at the temperature variation and get the Thermostat tuned by an HVAC expert.
Restart Your Nest Thermostat
Restarting a Nest thermostat is the most basic way to calibrate the device. To calibrate a Nest thermostat, press the Thermostat’s ring, and you will notice the screen going dark as soon as you do it. Leave the device for some time, and it will eventually turn on and run with the right settings.
Check the results against your thermometer. The temperature reading should be accurate after the restarting process has been successfully completed. Continue to the following steps if there is still a noticeable difference.
Clean Your Thermostat
If you observe a significant variation in the temperature readings of the Thermostat and thermometer, your thermostat might require a bit of cleaning.
Take off the cover, then carefully start cleaning each component. Use gentle cleaning agents when cleaning. Use a soft piece of cloth or a delicate brush.
You can use a dollar bill since it is soft and thin but still abrasive. Consequently, it is a great tool for cleaning internal magnetic connections.
When cleaning your Thermostat, avoid using a vacuum. The suction may be very intense and harsh for fragile components like coils.
Check The Bending in Mercury Vial
Nest thermostats include a little vial of mercury within that has to be levelled to maintain correct temperature regulation. You can use a common level to verify whether this alignment is correct and then can be corrected. If the measurement is incorrect, straighten the Thermostat’s position by adjusting its positioning.
Keep in mind that mercury should not contact your skin. So, never try to level the mercury vial with your fingertips or any other body part. If you have trouble levelling the mercury, you should consider calling an expert.
Adjust The Calibration Screw
The calibration process varies depending on the product, so read your handbook carefully before starting. If your Nest thermostat is a screw-type, an internal coil has a little screw to fine-tune its accuracy.
To calibrate the Thermostat, find the calibration screw within the Thermostat’s coiled metal, then search for the appropriate-sized screwdriver to pull it out and reattach it properly after the calibration.
This opening and closing of the contact reset them. Therefore, if a bad setting prevents the Thermostat from calibrating, it is fixed.
Check the Wiring
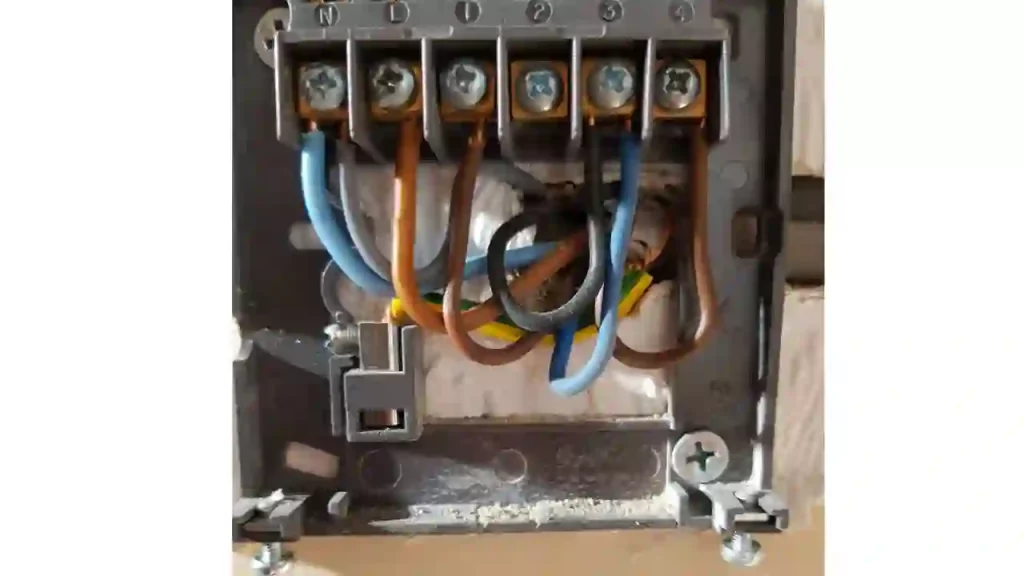
If your Thermostat’s calibration problems persist even after you’ve adjusted the calibrating screw, you should check the wiring conditions and ensure that all the lines are connected properly and are not corroded. Most thermostats struggle with corrosion and filth, which can affect their efficiency.
Therefore, use a soft or appropriate material to clean the corrosion or grime. Before shutting the Thermostat, make sure the calibration is accurate.
Check If your Thermostat is Calibrated
Use a thermometer to measure the room temperature once again to see if your Thermostat is functioning properly. To determine the temperature of your room, use a thermometer together with your Thermostat. Verify that both devices are giving the same reading. If it doesn’t, try restarting your Thermostat to see if the temperature returns to normal.
Check to see whether the temperature readings on the thermometer and thermostat mismatch. Make sure not to check the temperature before 15 minutes have passed.
If the readings continue to fluctuate, your Thermostat may have a more serious problem. Therefore, you must go for the assistance of a nest support specialist to fix it for you.
Conclusion
Considering the factor that makes the Nest thermostat read wrongly is crucial. When issues with the place, location, or purity connected to these situations are fixed, the Nest thermostat functions superbly.
You may improve your Nest thermostat’s reading accuracy by knowing how to calibrate it. The restart procedure helps the Nest thermostat avoid several issues that it runs into. Even if there are no problems, you should calibrate the Nest thermostat monthly.
Frequently Asked Questions
Can you calibrate your Nest thermostat?
When required, you can and should calibrate your Nest thermostat. By doing this, you can ensure that it gives you correct readings. It’s important to ensure that your Thermostat is correctly calibrated because it controls the temperature of your house and serves as the HVAC system’s brain. If the Thermostat isn’t calibrated, it won’t be able to gauge the temperature of your house accurately, your house will become unpleasant as a result, and your energy expenditures will go up.
Why is my Nest thermostat showing the wrong temperature?
There are several reasons for your nest thermostat to show the wrong temperature. The Nest thermostat might be installed incorrectly, and for that reason, it could be giving confusing readouts, or the Nest thermostat display the incorrect temperature since it may still be adjusting to the ambient temperature around the house and may not yet be aware of the seasons in terms of how cold and warm the house gets.
How do I calibrate my Nest thermostat temperature sensors?
You can use the Nest app to calibrate your Nest thermostat temperature sensor. If a certain room or section of your house is a few degrees warmer or colder than you want, the Google Nest Temperature Sensor can help you feel more comfortable. Your Thermostat will use the sensor’s temperature to heat or cool that space more precisely.
To make basic changes to your temperature sensor, you should follow the below steps:
- First, launch the Nest app.
- Tap on the setting icons on the home screen.
- Several sensor options will appear; you have to scroll down and select the sensor you want to change.
- You can make changes by selecting the various options given there.
Why is my Nest thermostat not reading correct temperature?
There are a few reasons why your Nest thermostat might be providing inaccurate readings. The most common reason is that the Nest thermostat is not calibrated correctly.
If the Nest thermostat is not calibrated correctly, it will not be able to accurately read the temperature of your home. If you think that the Nest thermostat is not calibrated correctly and therefore proving inaccurate reading, you can try recalibrating it.
Another reason why your Google Nest thermostat might not be reading the correct temperature could be because the sensors are dirty or obstructed.
If the sensors are dirty or obstructed, they will not be able to accurately read the temperature. You can clean the sensors with a soft cloth.
Does the Nest thermostat need to be calibrated?
Nest thermostats do not need to be calibrated, but doing so can improve their performance. Calibrating your Nest thermostat can help it more accurately adjust the temperature in your home, which can save you money on energy costs. If you’re not sure how to calibrate your Nest thermostat, there are a few things you can do to get started.
First, make sure that your Nest thermostat is properly installed according to the manufacturer’s instructions.
Turn on the power and allow the thermostat to go through its startup routine. After the Nest thermostat has been turned on, press the “Menu” button and then select the “Settings” option. From there, choose the “Calibrate Temperature” option.
Take a reading of the temperature in your home using a thermometer. Place the thermometer in an area of your home that is representative of the temperature in the rest of your house. Once you have a reading, enter it into the Nest thermostat. The Nest thermostat will then use this information to calibrate itself.
Calibrating your Nest thermostat is a simple process that can help ensure that it provides accurate temperature readings for your home. By taking a few minutes to do so, you can save yourself money on energy costs and improve the overall performance of your Nest thermostat.