
In 1830 Edwin Beard Budding invented the first manual push behind a rotary lawnmower. The machine had no engine, and the blades were driven by gears attached to the wheels. In 1893 James Sumner of Lancashire patented the first steam-powered lawnmower, and finally, in 1921, Knud and Oscar Jacobsen added a gas-powered engine.
Starting a Honda Lawnmower is straightforward.
- Check the gas and oil.
- Switch on the gas tap.
- Brake the blades and drive system.
- Set the choke.
- Press the starter button or pull the starter rope.
- Engage the blades and drive system.
- Set the throttle to run and mow the lawn. (Fix Throttle Cable)
The old days of continually yanking on a recalcitrant lawnmower starting chord no longer exist.
Unless the engine is faulty, the Honda lawnmower should start very quickly if you follow the steps listed below.
The Steps To Follow To Start A Honda Lawnmower
Honda lawn mowers are sold with two different starting systems.
- An automatic starting system.
- A manual starting system.
There may be differences between your Honda lawnmower and the procedures described below.
Different age models have various controls, as do other models within the current ranges.
The most common differences are.
The Choke Control
There are three possible choke controls.
Automatic Choke Control
Many of the latest model Honda lawnmowers have an automatic choke system controlled at the carburetor.
Manual Choke Control
A separate manual choke lever may be fitted to older Honda engines.
In this instance, the operator needs to set the choke to start the engine when it is cold.
Choke Control Incorporated In The Throttle
The most common manual choke control is incorporated in the throttle setting.
The throttle is set to “choke” or “start” to engage the choke and enrich the mixture.
Honda Lawnmower Blade Braking System
Honda lawn mowers are sold with two different blades (rotor) braking systems.
The Honda Roto-Stop Feature
Honda lawnmowers equipped with the Roto-Stop system have a prominent Yellow button on the bale lever.
Pressing this button stops the blades from moving and keeps the engine running.
It is a valuable feature because it allows you to cross a driveway, flower bed, or other obstacles without the blades moving.
When the opposite side is reached, stop pressing the button, and the blades start spinning again.
If your Honda lawnmower is fitted with this system, the engine automatically disengages the blades during the starting procedure. Because of this, ignore the step entitled “Disconnect The Honda Lawnmower The Cutting Blades.”
Honda Lawnmowers Fitted With A Separate Blade And Drive Control
On Honda lawnmowers fitted with a self-propelled drive system, two levers are called.
- Blade Clutch
- Drive Clutch
These need to be deactivated to start the lawnmower.
Honda Lawnmowers Fitted With A Single Bale Lever
The bale lever works in the same manner as a “dead man switch” on railway engines.
If it is let go, the Honda Lawnmower engine stops immediately.
So, to start machines with this device, you need to replace the step below by simply pulling the bale lever back to allow the engine to start and continue running.
Preparation To Make Before Starting All Honda Lawnmower Engines
Before starting the engine, check.
The Gas Tank Is Full
Open the gas tank cap and check the gas level.
Starting with a full tank saves a lot of hassle and having t refill out in the middle of your mowing session.
If you are starting the lawnmower for the first time after Winter, it is good practice to empty the old fuel and replace it with new. As fuel ages, it becomes gummy and can potentially block the carburetor jets.
Replacing the od with fresh fuel will prevent this from happening.
There is sufficient oil in the tank.
Checking the oil level is a good habit to develop, and while the lawnmower will start, if you don’t check the oil, if there is a problem, it will prevent possible catastrophic damage.
How To Use The Automatic Starting System?
Follow the steps below to start it safely.
Step 1 – Disconnect The Honda Lawnmower and The Cutting Blades
You need to prevent the cutting blades from spinning while starting the Honda lawnmower.
It is achieved by.
- Moving the “Blade Control” lever into the “Release” position.
- Moving the “Drive Clutch” lever to the “Release” position.
Step 2 – Switch The Gas Tap On
The gas tap is found on the left-hand side (when facing from the handlebars forward) of the Honda lawnmower.
It is installed below the gas filler cap beside the black square air filter cover.
Turn the gas tap counterclockwise to select the “on” position and the opposite way for the “off” position.
Step 2 – Set The Honda Lawnmower Throttle
You need to move the throttle position to the choke setting to ensure that the carburetor adjusts the mixture to a rich setting.
Move the throttle lever to the “Choke” setting to do this.
Once started, move the throttle back to the run setting.
Step 3 – Engage The Honda Lawnmower Starter Motor
Press the starter control. It is achieved by holding the engine switch in the start position until it begins to run.
The engine should start very quickly.
If it doesn’t start immediately, wait for ten to fifteen seconds before trying again. It allows the starter motor to cool down slightly and prevents wear.
Step 4 – Warm The Honda Lawnmower Engine Up
Before you start to use the lawnmower, allow it a few minutes to get all of the components up to optimal operating temperature.
It will help with the long-term durability of the lawnmower.
Step 5 – Start Mowing With The Honda Lawnmower
Engage the “Blade Control” and “Drive Control.”
Move the throttle lever to the fast (hare symbol) position, and as long as the engine is sounding in order, you can begin to mow.
Move the throttle back to the idle position when you want to take a short break or to move an obstruction out of the way.
How to use the manual Honda Lawnmower starting procedure?
If the Honda lawnmower is not fitted with an automatic starting system or the battery is insufficiently charged, you can use the manual starting procedure.
Step 1 – Disconnect The Honda Lawnmower Cutting Blades
As with the automated starting system, stopping the cutting blades from spinning while you start the Honda lawnmower is important.
Once again, this is achieved by;
- Move the “Blade Control” lever into the “Release” position.
- Move the “Drive Clutch” lever to the “Release” position.
If the Honda Lawnmower does not have an automatic choke control, set the throttle lever to the “Choke” setting (A circle with a line in the middle).
Step 2 – Start The Honda Lawnmower
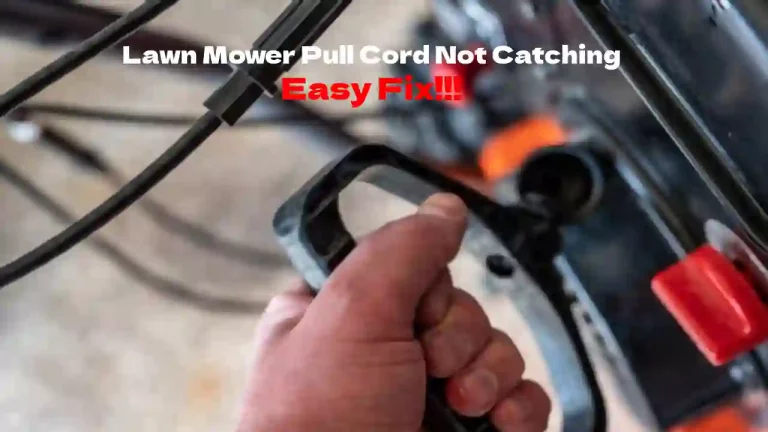
Place your foot onto the deck step of the mower and gently pull the starter cord a short way out until you feel some resistance.
Vigorously pull the cord outward to start the Honda lawnmower engine.
Allow the cord to recoil.
If the lawnmower doesn’t start on the first pull, try a few more times. If there is still no joy, you will need to try to diagnose the problem.
Step 3 – Warm The Honda Lawnmower Engine Up
If the engine starts, let it run for three minutes to warm up, allowing the components to reach optimal operating temperature.
It will help with the long-term durability of the lawnmower.
Step 4 – Start Mowing With The Honda Lawnmower
Engage the “Blade Control” and “Drive Control.”
Move the throttle lever to the fast (hare symbol) position and start to mow the lawn.
Conclusion
The many different models of Honda Lawnmower have one thing in common: they are all designed with ease of use in mind. Breaking down the steps needed to start a Honda Lawnmower may seem overly complicated, but it isn’t.
With models of Honda lawnmowers available with features lie Roto-Stop, automatic propulsion drive, and automatic chokes, Honda ensures that as later models are released, they become even easier to operate.
Check this article to fix Honda Lawn Mower Self Propelled Slow.


![Which Way To Tilt A Lawn Mower? [Don’t Do This]](https://howtl.com/wp-content/uploads/2022/04/which-way-to-tilt-lawn-mower-768x432.webp)